Install & Maintain Solar Powered Fake Surveillance Cameras Externally
Solar-powered fake surveillance cameras offer an eco-friendly, cost-effective security solution. To…….
Solar-powered fake surveillance cameras offer an eco-friendly, cost-effective security solution. To install them, choose a sunny location, clear obstructions, and comply with local regulations. The simple setup involves mounting the solar panel and camera unit for optimal performance. Regular cleaning and maintenance ensure clear footage and prevent damage, prolonging the device's useful life.
“Uncover the power of protection with Solar Powered Fake Surveillance Cameras—an innovative, environmentally friendly option for enhancing home security. This comprehensive guide delves into the installation process of these realistic decoys, offering a simple step-by-step approach to mounting them on your exterior. From understanding the benefits of solar technology to maintenance tips for optimal performance, you’ll learn how to effectively utilize these cameras as a powerful deterrent.”
- Understanding Solar-Powered Fake Surveillance Cameras
- Preparing Your Exterior Space for Mounting
- Step-by-Step Installation Guide
- Maintenance and Care Tips for Optimal Performance
Understanding Solar-Powered Fake Surveillance Cameras
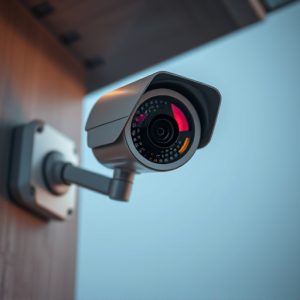
Solar-powered fake surveillance cameras are a clever and innovative way to enhance security while adding an element of deception. Unlike traditional CCTV systems, these solar cameras operate independently using renewable energy from the sun. They’re designed to mimic real security equipment, often featuring flashing red LEDs and movement sensors to deter potential intruders.
Understanding how they work is crucial for effective installation. These cameras typically consist of a solar panel, battery, motion sensor, and camera housing. The solar panel absorbs sunlight during the day, charging the integrated battery. When motion is detected, the camera activates, capturing footage that can be stored locally or transmitted to a monitoring system. This eco-friendly approach not only saves on electricity bills but also blends seamlessly into outdoor environments, making them ideal for residential, commercial, and industrial security needs.
Preparing Your Exterior Space for Mounting
Before installing your solar-powered fake surveillance cameras, preparing your exterior space is crucial. Start by ensuring a clear and suitable location for mounting. This area should have ample sunlight exposure during the day to power the cameras effectively. Clear any obstructions like trees or large buildings that might cast shadows, as this could hinder the camera’s performance. Additionally, consider the proximity to potential entry points, such as doors or windows, to maximize surveillance effectiveness.
Check local regulations and guidelines regarding security cameras in your area. Some locations have specific requirements for mounting outdoor cameras, so it’s essential to comply to avoid any legal issues. Once your space is ready, you can proceed with the actual mounting process, ensuring a secure and stable installation for optimal camera functionality.
Step-by-Step Installation Guide
Installing exterior solar-powered fake surveillance cameras is a straightforward process that can enhance your home or business security with minimal effort. Here’s a step-by-step guide to ensure a seamless setup:
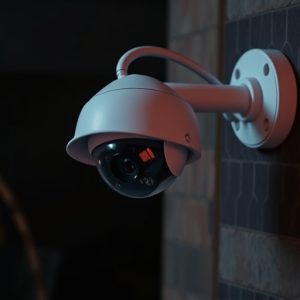
1. Choose the Ideal Location: Select a spot that receives ample sunlight, typically a wall or pole outside your property. Ensure it’s visible enough for the camera to capture clear footage while being protected from direct weather exposure. Clean the surface thoroughly to facilitate proper adhesion.
2. Unbox and Assemble: Begin by unboxing your solar-powered fake surveillance camera kit. Follow the manufacturer’s instructions to assemble the components, including mounting hardware, solar panel, and the camera unit itself. Ensure all parts are secure and properly connected before proceeding.
3. Attach the Solar Panel: Mount the solar panel in a position where it can capture direct sunlight for optimal energy generation. Secure it firmly, typically using screws or adhesive, ensuring it’s angled correctly to face the sun.
4. Fix the Camera Unit: Attach the camera unit to the mounting hardware provided. This usually involves securing it with screws or brackets designed for the specific model. Align the camera so that its field of view captures the desired area effectively.
5. Test and Adjust: Once installed, test the camera’s functionality, including motion detection (if applicable). Make any necessary adjustments to ensure the camera covers the intended area comprehensively.
Maintenance and Care Tips for Optimal Performance
Regular cleaning and maintenance are essential for keeping your solar-powered fake surveillance cameras in top condition. Since these devices are often exposed to outdoor elements, it’s crucial to wipe down the lenses and housing with a soft, damp cloth to remove dust and debris regularly. This simple step ensures clear footage and prevents any buildup that could obstruct the camera’s view.
Additionally, inspect the mounting areas for any signs of damage or loose connections. Tighten any screws or brackets as needed, ensuring the cameras are securely attached. Remember to check the solar panels’ cleanliness too; a blocked panel will hinder the camera’s power source. Keeping these devices well-maintained will guarantee their longevity and optimal performance in providing enhanced security.
Solar-powered fake surveillance cameras offer a sleek, effective, and eco-friendly solution for home security. By understanding their unique benefits and following simple mounting instructions, you can easily transform your exterior space into a secure environment. With proper preparation and regular maintenance, these innovative devices will provide peace of mind and enhanced safety without breaking the bank. Embrace the power of solar technology and take control of your home’s security today!